Hey there! I'm a supplier of rubber elbows, and today I'm gonna walk you through the process of installing a rubber elbow in a horizontal pipeline. Whether you're a DIY enthusiast or a professional plumber, this guide will help you get the job done right.
Why Use a Rubber Elbow?
Before we dive into the installation process, let's quickly talk about why you might want to use a rubber elbow in your horizontal pipeline. Rubber elbows are flexible, which means they can absorb vibrations and movements in the pipeline. This is especially useful in areas where there's a lot of traffic or machinery that could cause the pipeline to shake. They also provide a tight seal, preventing leaks and reducing the risk of corrosion.
Tools and Materials You'll Need
Here's what you'll need to install a rubber elbow in a horizontal pipeline:
- Rubber elbow
- Pipe cutter or saw
- Measuring tape
- Wrench or pliers
- Sealant or gasket
- Safety glasses and gloves
Step 1: Measure and Cut the Pipeline
The first step is to measure the length of the pipeline where you want to install the rubber elbow. Use a measuring tape to get an accurate measurement, and mark the spot where you'll need to cut the pipeline. Make sure to leave enough room for the rubber elbow to fit comfortably.
Once you've marked the spot, use a pipe cutter or saw to cut the pipeline. Be careful to make a clean, straight cut. If you're using a saw, wear safety glasses to protect your eyes from flying debris.
Step 2: Prepare the Rubber Elbow
Before you install the rubber elbow, you'll need to prepare it for installation. Start by inspecting the rubber elbow for any damage or defects. If you notice any issues, don't use the rubber elbow and contact your supplier for a replacement.
Next, clean the ends of the rubber elbow with a clean cloth to remove any dirt or debris. This will help ensure a tight seal when you install the elbow.
Step 3: Apply Sealant or Gasket
To prevent leaks, it's important to apply a sealant or gasket to the ends of the rubber elbow. You can use a silicone-based sealant or a rubber gasket, depending on your preference. Apply the sealant or gasket evenly around the ends of the elbow, making sure to cover the entire surface.
Step 4: Install the Rubber Elbow
Now it's time to install the rubber elbow in the horizontal pipeline. Start by inserting one end of the elbow into the cut end of the pipeline. Make sure the elbow is aligned properly and sits flush against the pipeline.
Once you've inserted one end of the elbow, use a wrench or pliers to tighten the bolts or clamps that hold the elbow in place. Be careful not to over-tighten the bolts, as this could damage the rubber elbow.
Next, insert the other end of the elbow into the other cut end of the pipeline. Again, make sure the elbow is aligned properly and sits flush against the pipeline. Use a wrench or pliers to tighten the bolts or clamps on this end of the elbow.
Step 5: Check for Leaks
After you've installed the rubber elbow, it's important to check for leaks. Turn on the water or other fluid in the pipeline and let it run for a few minutes. Inspect the rubber elbow and the surrounding area for any signs of leaks. If you notice any leaks, tighten the bolts or clamps slightly and check again.
Step 6: Test the Pipeline
Once you've confirmed that there are no leaks, it's time to test the pipeline. Turn on the water or other fluid in the pipeline and let it run for a few hours. Monitor the pipeline for any signs of problems, such as leaks, vibrations, or unusual noises. If you notice any issues, shut off the pipeline immediately and contact a professional plumber.


Tips and Tricks
- Make sure to choose the right size rubber elbow for your pipeline. Using the wrong size elbow could cause leaks or other problems.
- If you're installing the rubber elbow in a high-traffic area, consider using a reinforced rubber elbow to provide extra durability.
- When tightening the bolts or clamps, use a torque wrench to ensure that you're applying the correct amount of pressure.
- If you're having trouble installing the rubber elbow, don't hesitate to contact your supplier for assistance. They can provide you with additional tips and advice to help you get the job done right.
Related Products
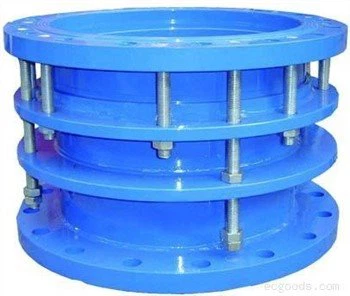
If you're interested in other types of pipe fittings, we also offer Flange Pipe Expansion Joint and Double Flange Expansion Joint. These products are designed to provide flexibility and absorb movements in the pipeline, similar to rubber elbows.
Conclusion
Installing a rubber elbow in a horizontal pipeline is a relatively simple process that can be completed by most DIY enthusiasts. By following the steps outlined in this guide and using the right tools and materials, you can ensure a successful installation and prevent leaks and other problems.
If you have any questions or need further assistance, please don't hesitate to contact us. We're here to help you find the right rubber elbow for your needs and provide you with the support you need to get the job done right.
References
- "Pipe Fitting Handbook" by the American Society of Plumbing Engineers
- "Plumbing Installation Guide" by the National Association of Home Builders