Testing the leakage of a metal seat valve is crucial for ensuring its proper functionality and safety. As a metal seat valve supplier, I've encountered various situations where accurate leakage testing is a must. In this blog, I'll share some practical methods and insights on how to test the leakage of a metal seat valve.
Why Leakage Testing Matters
Before we dive into the testing methods, let's understand why leakage testing is so important. A leaking metal seat valve can lead to a variety of problems. For one, it can cause a loss of the medium flowing through the valve, whether it's gas, liquid, or some other substance. This not only results in wasted resources but can also be costly for the end - user. In some industrial settings, the leaked medium might be hazardous, posing risks to the environment and the safety of workers.
Moreover, a leaking valve can affect the overall efficiency of a system. If a valve is supposed to control the flow precisely and it's leaking, the system might not operate as intended, leading to inefficiencies and potential malfunctions.
Visual Inspection
The first step in testing a metal seat valve for leakage is a visual inspection. It's a simple yet effective way to spot obvious signs of leakage. Start by looking at the valve body and its connections. Check for any signs of corrosion, cracks, or damage. Corrosion can weaken the valve structure and create paths for leakage. Cracks, especially near the seat or the sealing areas, are a clear indication that there might be a problem.
Also, look for any signs of the medium on the outside of the valve. If it's a liquid - handling valve, you might see drips or stains. For gas valves, you might notice a hissing sound or see condensation forming around a potential leak point.
Pressure Testing
Pressure testing is one of the most common and reliable methods for testing valve leakage. There are two main types of pressure tests: hydrostatic testing and pneumatic testing.
Hydrostatic Testing
Hydrostatic testing involves filling the valve with a liquid, usually water, and then applying pressure. The reason water is often used is that it's incompressible, which makes it easier to control the pressure and detect leaks.
To perform a hydrostatic test, first, make sure the valve is properly installed and all the connections are tightened. Then, close the valve and fill it with water. Use a pump to gradually increase the pressure to the specified test pressure. The test pressure is usually higher than the normal operating pressure to ensure that the valve can withstand extreme conditions.
Keep the pressure stable for a certain period, typically around 10 - 30 minutes, depending on the valve size and the industry standards. During this time, closely monitor the pressure gauge. If the pressure drops, it could be a sign of leakage. You can also use a soap solution to check for leaks at the connections and sealing areas. Apply the soap solution, and if there are any leaks, bubbles will form.
Pneumatic Testing
Pneumatic testing, on the other hand, uses a gas, usually air or nitrogen, to test the valve. This method is often used when the valve is going to be used in a gas - handling system.
The process is similar to hydrostatic testing. Close the valve and introduce the gas into the valve. Increase the pressure to the test pressure using a compressor. One advantage of pneumatic testing is that it can detect very small leaks because gas can escape through smaller openings compared to liquid. However, it's also more dangerous because gas can be explosive in some environments, so proper safety precautions must be taken.
Bubble Testing
Bubble testing is a simple and inexpensive way to detect small leaks. As mentioned earlier, you can use a soap solution for this test. After applying pressure to the valve, either through hydrostatic or pneumatic testing, apply the soap solution to all the potential leak points, such as the valve stem, the seat, and the connections.
If there's a leak, the pressure will force the gas or liquid through the leak point, and the soap solution will form bubbles. This method is especially useful for detecting leaks in hard - to - reach areas or for finding very small leaks that might not be detected by just monitoring the pressure gauge.
Ultrasonic Leak Detection
Ultrasonic leak detection is a more advanced method. It uses ultrasonic sensors to detect the high - frequency sound waves produced by a leak. When a gas or liquid escapes through a small opening, it creates a turbulent flow that generates ultrasonic waves.
To use this method, place the ultrasonic sensor near the valve and scan the area. The sensor will pick up the ultrasonic waves and convert them into an audible signal or a visual display. This method is very sensitive and can detect leaks that are not visible or detectable by other methods. However, it requires specialized equipment and trained personnel to operate.
Testing Our Metal Seat Valves
As a metal seat valve supplier, we take leakage testing very seriously. We test all our valves using a combination of the methods mentioned above. For example, our Wormgear Double Flanged Butterfly Valves go through rigorous pressure testing to ensure they meet the highest quality standards.
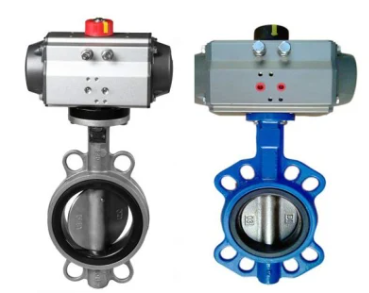
Our Stainless Steel Ci Wafer Butterfly Valve With Pneumatic Actuator is also tested using visual inspection, bubble testing, and ultrasonic leak detection to guarantee its performance and reliability. And our VITON Seated Butterfly Valve undergoes similar comprehensive testing procedures.

Conclusion
Testing the leakage of a metal seat valve is a multi - step process that involves visual inspection, pressure testing, bubble testing, and in some cases, ultrasonic leak detection. Each method has its own advantages and is suitable for different situations. By using a combination of these methods, you can ensure that your metal seat valve is leak - free and operating safely and efficiently.
If you're in the market for high - quality metal seat valves and want to learn more about our products and our testing procedures, don't hesitate to reach out. We're here to help you find the right valve for your needs and ensure that it meets all your requirements.
References
- "Valve Testing Handbook" by Valve Manufacturers Association
- Industry standards and guidelines for valve testing from relevant regulatory bodies.


