As a seasoned globe valve supplier, I've witnessed firsthand the pivotal role that proper alignment plays during the installation process. A well - aligned globe valve not only ensures optimal performance but also extends the valve's lifespan, reducing maintenance costs and minimizing the risk of system failures. In this blog, I'll share some essential tips on how to align a globe valve properly during installation.
Understanding the Basics of Globe Valves
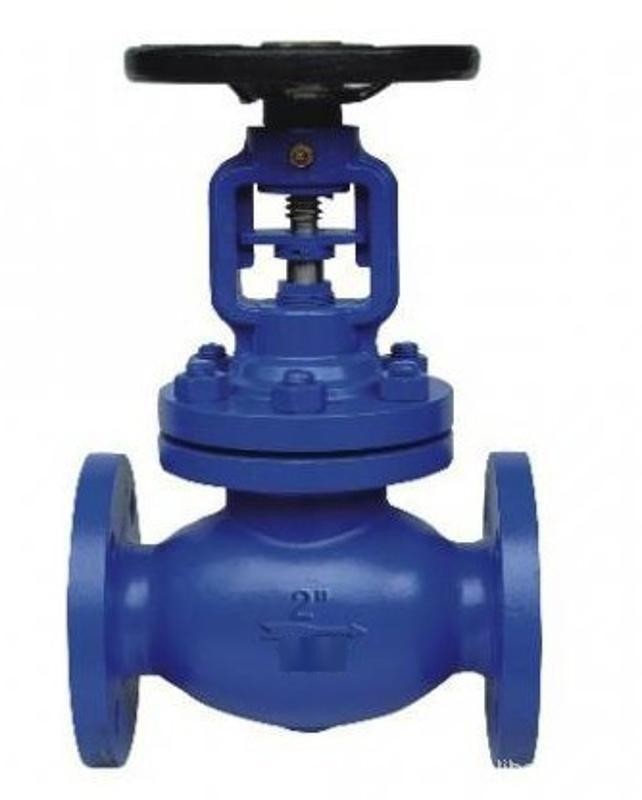
Before delving into the alignment process, it's crucial to have a basic understanding of globe valves. Globe valves are linear motion valves used for regulating flow in a pipeline. They consist of a movable disk (plug) and a stationary ring seat in a generally spherical body. The flow path through a globe valve is more tortuous compared to other types of valves, which gives it excellent throttling capabilities.
We offer a wide range of globe valves, including the American Standard Manual Globe Valve, Carbon Steel Wcb Stainless Steel CF8 CF8m Flanged End Globe Valve, and Bellows Globe Valve. Each type has its unique features and applications, but the alignment principles remain largely the same.
Pre - installation Checks
Inspection of the Valve
Before installation, carefully inspect the globe valve for any visible damage, such as cracks, scratches, or dents. Check the valve's seat and disc for proper seating and smooth operation. Ensure that all the valve components, including the stem, bonnet, and gaskets, are in good condition. Any damaged parts should be replaced before proceeding with the installation.
Pipeline Preparation
Inspect the pipeline where the globe valve will be installed. The pipeline should be clean and free of debris, rust, or any foreign materials that could damage the valve. Check the pipeline flanges for proper alignment and flatness. Misaligned flanges can cause stress on the valve during installation and lead to leakage or premature failure.
Alignment Steps
1. Determine the Flow Direction
Globe valves are designed to have a specific flow direction. The flow should enter the valve under the seat and exit above it. This flow direction ensures proper sealing and reduces the pressure drop across the valve. The flow direction is usually indicated on the valve body by an arrow. Make sure to align the valve with the correct flow direction in the pipeline.
2. Positioning the Valve
Place the globe valve in the pipeline at the desired location. Use lifting equipment if necessary to ensure safe and accurate positioning. Align the valve flanges with the pipeline flanges. You can use alignment pins or bolts to hold the flanges in place temporarily. Ensure that there is enough clearance around the valve for maintenance and operation.
3. Flange Alignment
Use a straightedge or a laser alignment tool to check the alignment of the valve flanges with the pipeline flanges. The flanges should be parallel and concentric within the specified tolerance. Misaligned flanges can cause uneven stress distribution on the valve gaskets, leading to leakage. If the flanges are misaligned, adjust the position of the valve or the pipeline until the alignment is correct.
4. Bolt Tightening
Once the flanges are properly aligned, insert the bolts through the flange holes. Use the correct size and grade of bolts as specified by the valve manufacturer. Tighten the bolts in a criss - cross pattern to ensure even distribution of the clamping force. Do not overtighten the bolts, as this can damage the flanges or the gaskets. Follow the recommended torque values provided by the valve manufacturer.
5. Stem Alignment
If the globe valve has a long stem, ensure that the stem is properly aligned with the actuator or the operating mechanism. Misaligned stems can cause binding or uneven operation of the valve. Check the stem for smooth movement and make any necessary adjustments.
Post - installation Checks
Leakage Test
After the valve is installed and the bolts are tightened, perform a leakage test. Apply pressure to the pipeline and check for any signs of leakage around the valve flanges, bonnet, or stem. If leakage is detected, identify the source of the leak and take appropriate corrective actions, such as retightening the bolts or replacing the gaskets.
Operational Test
Operate the globe valve several times to ensure smooth and proper operation. Check the valve's opening and closing torque, and make sure that the valve can be fully opened and closed. If there are any issues with the valve's operation, such as excessive friction or binding, investigate and resolve the problem.
Importance of Proper Alignment
Proper alignment of a globe valve is essential for several reasons. Firstly, it ensures a tight seal between the valve seat and the disc, preventing leakage and reducing the risk of product loss or environmental contamination. Secondly, it reduces the pressure drop across the valve, improving the overall efficiency of the pipeline system. Thirdly, proper alignment minimizes the stress on the valve components, extending the valve's lifespan and reducing maintenance costs.
Conclusion
Aligning a globe valve properly during installation is a critical step that should not be overlooked. By following the steps outlined in this blog, you can ensure that your globe valve is installed correctly and operates efficiently. If you have any questions or need further assistance with globe valve installation or alignment, please feel free to contact us for more information. We are always ready to help you find the best solutions for your valve needs and look forward to discussing your procurement requirements.

References
- Valve Handbook, Third Edition by J. Paul Tullis
- ASME B16.34 - 2017, Valves - Flanged, Threaded, and Welding End
- API 602 - 2018, Compact Steel Gate, Globe, and Check Valves


