Installing an OEM butterfly valve in a marine environment requires careful planning, adherence to specific procedures, and consideration of the unique challenges posed by the marine setting. As an OEM butterfly valve supplier, I understand the importance of providing clear guidance on this process to ensure a successful installation. In this blog post, I will walk you through the steps involved in installing an OEM butterfly valve in a marine environment.
Pre - installation Preparations
1. Site Assessment
Before starting the installation, conduct a thorough site assessment. Examine the location where the valve will be installed. Check for any potential obstructions, the available space for valve operation and maintenance, and the accessibility of the area. In a marine environment, it is also crucial to assess the level of corrosion risk, as saltwater can be highly corrosive. Look for signs of existing corrosion on nearby pipes or equipment, and evaluate the environmental conditions such as humidity and exposure to sea spray.
2. Valve Selection
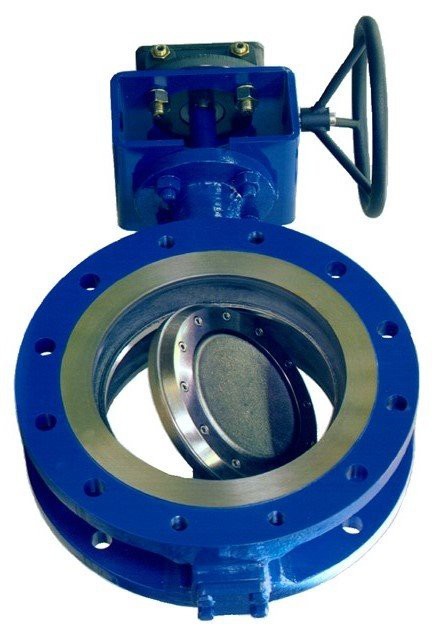
Choose the right type of OEM butterfly valve for your marine application. We offer a variety of options, including Pneumatic Flange Butterfly Valve, Bare Shaft Butterfly Valve, and RF Butterfly Valve. Consider factors such as the flow rate requirements, pressure ratings, and the type of fluid being handled. For example, if you need a valve that can be remotely controlled, a pneumatic flange butterfly valve might be a suitable choice. If space is limited, a bare - shaft butterfly valve could be more appropriate.
3. Inspection of the Valve
Inspect the valve upon arrival. Check for any visible damage during transit, such as dents, scratches, or misaligned parts. Ensure that all the components, including the disc, stem, and seals, are in good condition. Verify that the valve meets the specified dimensions and ratings. Refer to the valve's documentation for detailed inspection guidelines.
4. Gathering Tools and Materials
Collect all the necessary tools and materials for the installation. This may include wrenches, bolts, gaskets, sealants, and lifting equipment if the valve is large and heavy. Make sure that the tools are in good working condition and are appropriate for the size and type of the valve.
Installation Process
1. Pipe Preparation
Clean the pipe ends where the valve will be installed. Remove any dirt, debris, or rust using a wire brush or a suitable cleaning agent. Ensure that the pipe ends are smooth and free from any burrs. Measure the pipe dimensions to ensure they match the valve's flange dimensions. If necessary, make any adjustments to the pipes to ensure a proper fit.
2. Gasket Installation
Place a suitable gasket between the valve flange and the pipe flange. The gasket should be made of a material that is resistant to the fluid being handled and the marine environment. Common gasket materials for marine applications include rubber, neoprene, or PTFE. Make sure the gasket is centered and properly aligned to prevent leaks.
3. Valve Positioning
Lift the valve into position using the appropriate lifting equipment. Align the valve flanges with the pipe flanges. Ensure that the valve is oriented correctly according to the flow direction indicated on the valve body. Use alignment pins or other alignment tools if available to ensure accurate positioning.
4. Bolt Installation
Insert the bolts through the valve flanges and the pipe flanges. Use the correct size and type of bolts as specified in the valve's installation manual. Tighten the bolts gradually and evenly in a criss - cross pattern to ensure uniform pressure distribution. Over - tightening the bolts can damage the gaskets and cause leaks, while under - tightening can also lead to leakage. Refer to the torque values provided in the valve's documentation for proper bolt tightening.

5. Stem and Actuator Installation (if applicable)
If the valve is equipped with an actuator, such as a pneumatic or electric actuator, install it according to the manufacturer's instructions. Connect the actuator to the valve stem securely. Ensure that the actuator is properly calibrated and adjusted to operate the valve smoothly. Check the electrical or pneumatic connections for any leaks or loose connections.
6. Testing
Once the valve is installed, conduct a pressure test to check for leaks. Close the valve and apply pressure to the system. Monitor the valve and the surrounding connections for any signs of leakage. If a leak is detected, identify the source and take appropriate measures to correct it, such as tightening the bolts or replacing the gasket.
Post - installation Considerations
1. Protection against Corrosion
In a marine environment, corrosion is a major concern. Apply a suitable anti - corrosion coating to the valve body and exposed parts. This can help protect the valve from the corrosive effects of saltwater and humidity. Regularly inspect the valve for any signs of corrosion and re - apply the coating as needed.
2. Maintenance Plan
Develop a maintenance plan for the valve. This should include regular inspections, lubrication of moving parts, and replacement of worn - out components. Follow the manufacturer's recommendations for maintenance intervals and procedures.
3. Documentation
Keep detailed records of the valve installation, including the installation date, valve specifications, test results, and maintenance history. This documentation will be useful for future reference and for ensuring compliance with any regulatory requirements.
Troubleshooting
1. Leakage
If there is leakage around the valve flanges, check the gasket for damage or improper installation. Tighten the bolts evenly if they are loose. If the leakage persists, replace the gasket with a new one.
If there is internal leakage through the valve, check the disc and seat for damage. The disc may be worn or misaligned, or the seat may be damaged. In such cases, the damaged components may need to be replaced.
2. Difficulty in Operation
If the valve is difficult to operate, check for any obstructions in the valve mechanism. Lubricate the moving parts if necessary. If the actuator is not functioning properly, check the electrical or pneumatic connections and the actuator's internal components.
Conclusion
Installing an OEM butterfly valve in a marine environment requires a systematic approach and attention to detail. By following the steps outlined in this blog post, you can ensure a successful installation and reliable operation of the valve. As an OEM butterfly valve supplier, we are committed to providing high - quality valves and excellent technical support. If you have any questions or need further assistance with valve selection, installation, or maintenance, please feel free to contact us for a detailed discussion and potential procurement.
References
- Marine Valve Installation Guidelines, Industry Standard Handbook
- Butterfly Valve Manufacturer's Installation and Maintenance Manuals


